Solar Battery Maintenance Guide for Reliable Energy Storage
- Dec 22, 2025
- 8 min read
Roughly eighty percent of American homeowners with solar panels say long battery life is a top priority for their investment. The quality of your solar battery maintenance can make a difference between years of dependable energy and sudden, costly failures. By understanding the right steps and having the proper tools at your fingertips, you can extend your system’s performance and avoid common mistakes that threaten efficiency and safety.
Table of Contents
Quick Summary
Key Message | Explanation |
1. Prepare Your Workspace Properly | A clean and organized setup reduces accidents and promotes precise maintenance work on your solar battery system. |
2. Inspect Connections for Issues | Regular checks for corrosion and loose terminals help identify potential failures before they occur. |
3. Clean Battery Terminals Regularly | Removing corrosion ensures stable electrical contact, improving overall system performance and safety. |
4. Test Battery Performance Accurately | Using a multimeter to check voltage and load helps gauge the battery’s health and anticipate future needs. |
5. Document All Maintenance Actions | Keeping a detailed log of inspections and repairs aids in tracking performance and scheduling future maintenance efficiently. |
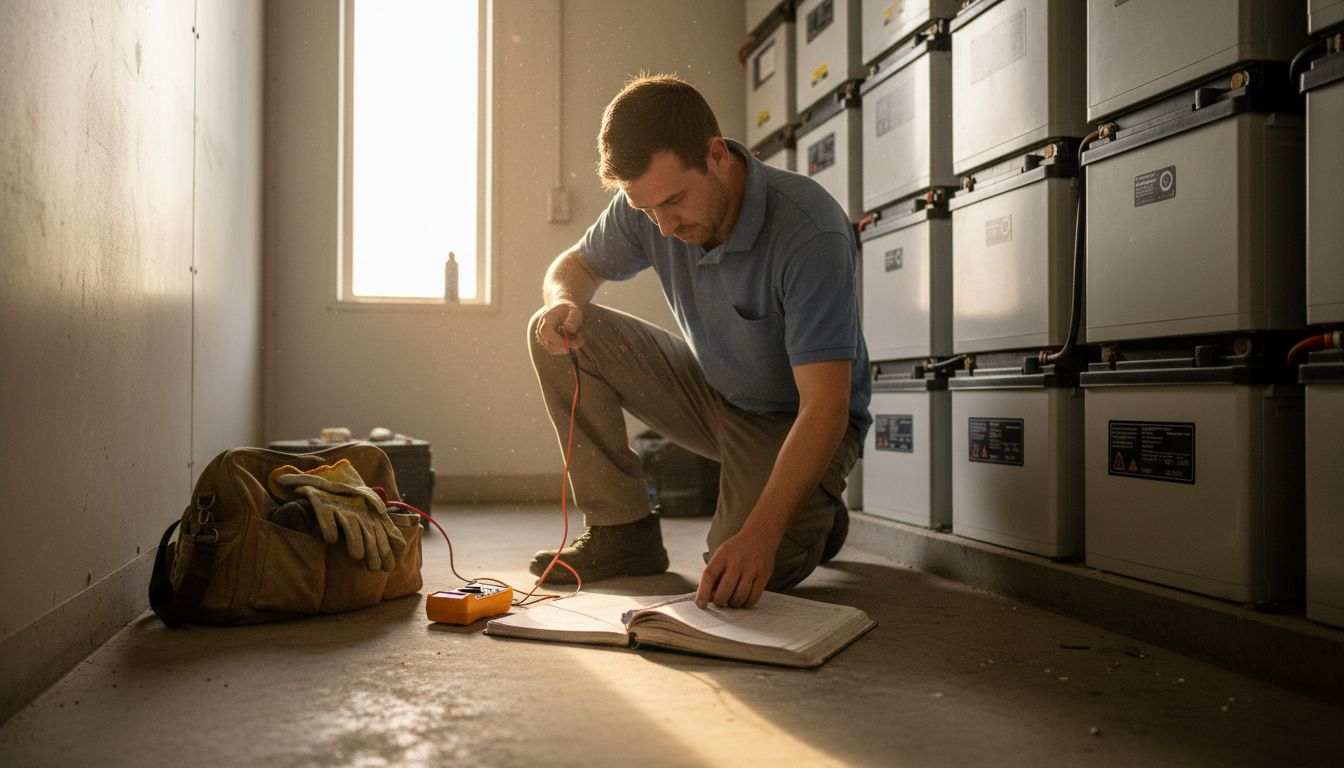
Step 1: Prepare System and Gather Essential Tools
Before diving into solar battery maintenance, you’ll want to set yourself up for success by preparing your workspace and collecting the right equipment. Think of this as your mission prep something like a professional technician would approach a critical system check.
Start by gathering your toolkit. You’ll need some key items: a digital multimeter, insulated safety gloves, protective eyewear, wire strippers, torque wrench, cleaning supplies, and a comprehensive maintenance log. Mechanical and electrical checks are crucial for system longevity, so having the right tools ready is your first line of defense.
Before beginning any work, ensure your solar battery system is completely disconnected from power sources. This means shutting down inverters, disconnecting grid connections, and verifying zero electrical activity with your multimeter. Clear your workspace of any potential obstructions and make sure you have excellent lighting. A clean, organized environment helps prevent accidents and allows for more precise maintenance work.
Pro Tip: Always keep a fire extinguisher rated for electrical fires nearby when working with battery systems, and ensure you have a clear path to exit the work area in case of unexpected complications.
Here’s a reference comparing key solar battery maintenance tools and their primary function:
Tool | Primary Use | Maintenance Stage |
Digital Multimeter | Measure voltage and current | Inspection, Testing |
Insulated Gloves | Protect from electricity | All physical work |
Wire Brush | Clean corrosion from terminals | Terminal maintenance |
Torque Wrench | Tighten connections correctly | Connection checks |
Maintenance Log | Record metrics & notes | Documentation step |
Step 2: Inspect Battery Connections and Housing
Now that your workspace is prepared, it is time to carefully examine the heart of your solar battery system its connections and housing. This critical step helps you catch potential issues before they escalate into expensive repairs or system failures.
Mechanical and electrical inspections are fundamental for maintaining system integrity. Start by visually scanning all battery connections for signs of corrosion, discoloration, or loose terminals. Use your insulated gloves and wear protective eyewear while checking each connection point. Gently wiggle terminals to ensure they are securely fastened no wiggle room means a good connection. Look for any green or white powdery residue around terminals, which indicates corrosion and potential electrical resistance.
Next, inspect the battery housing for any physical damage, cracks, or signs of moisture intrusion. Pay special attention to seal conditions and mounting brackets. Ensure the housing is clean, dry, and free from debris that could compromise its protective function. Check that ventilation paths remain unobstructed and that no external damage could impact the batterys performance or safety.
Pro Tip: Use a digital camera or smartphone to document the condition of connections and housing during your inspection, creating a visual maintenance log that helps track changes over time.
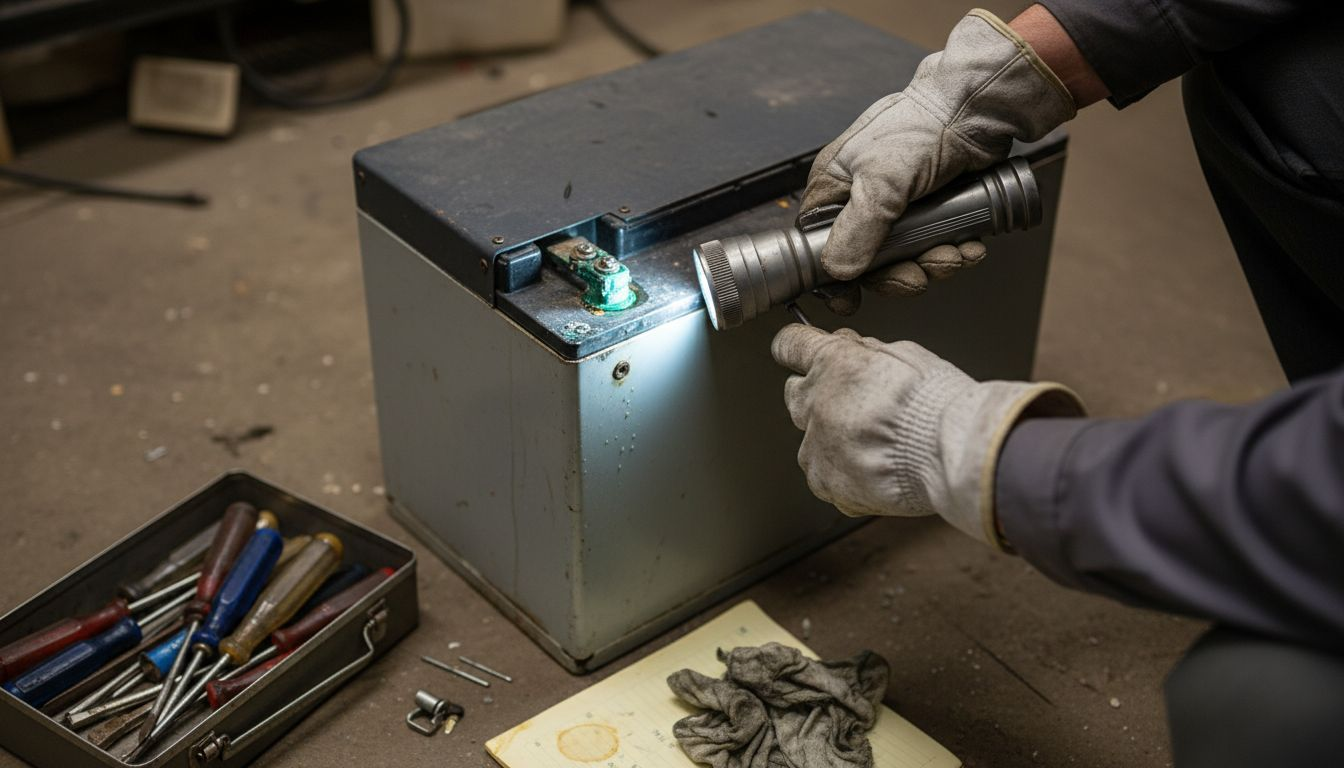
Step 3: Clean Terminals and Check for Corrosion
With your battery connections thoroughly inspected, its time to address one of the most critical maintenance tasks preventing electrical resistance and potential system failure. Cleaning battery terminals is like giving your solar energy system a health checkup.
Maintaining clean electrical connections is essential for system performance, so approach this task with precision. Begin by mixing a solution of baking soda and water to create a gentle cleaning agent. Using a wire brush with non metallic bristles, carefully scrub each terminal to remove any corrosive buildup. White or greenish powdery residue indicates oxidation start by neutralizing these areas. Wear protective gloves and eyewear during this process to protect yourself from potential chemical interactions.
After cleaning, dry the terminals completely with a clean microfiber cloth. Apply a thin layer of dielectric grease to the cleaned terminals this creates a protective barrier against future moisture and corrosion. Ensure connections are tight but do not over tighten, which could damage the terminal or battery housing. A light coating of protective grease will help maintain electrical conductivity and prevent future oxidation.
Pro Tip: Always keep a dedicated set of cleaning tools for battery maintenance separate from other workshop equipment to prevent cross contamination and potential electrical interference.
Step 4: Test Charge Levels and Battery Performance
With your battery terminals cleaned and connections inspected, its time to dive into the most crucial part of maintenance understanding your solar batterys true health and performance. Think of this step as giving your energy storage system a comprehensive medical examination.
Monitoring battery state of charge provides critical insights into system performance, so grab your digital multimeter and prepare for a detailed assessment. Start by checking the batterys open circuit voltage when fully rested no charging or discharging for at least 6 hours. Compare the reading against the manufacturers recommended voltage range for your specific battery type. A significant deviation could signal potential degradation or internal issues.
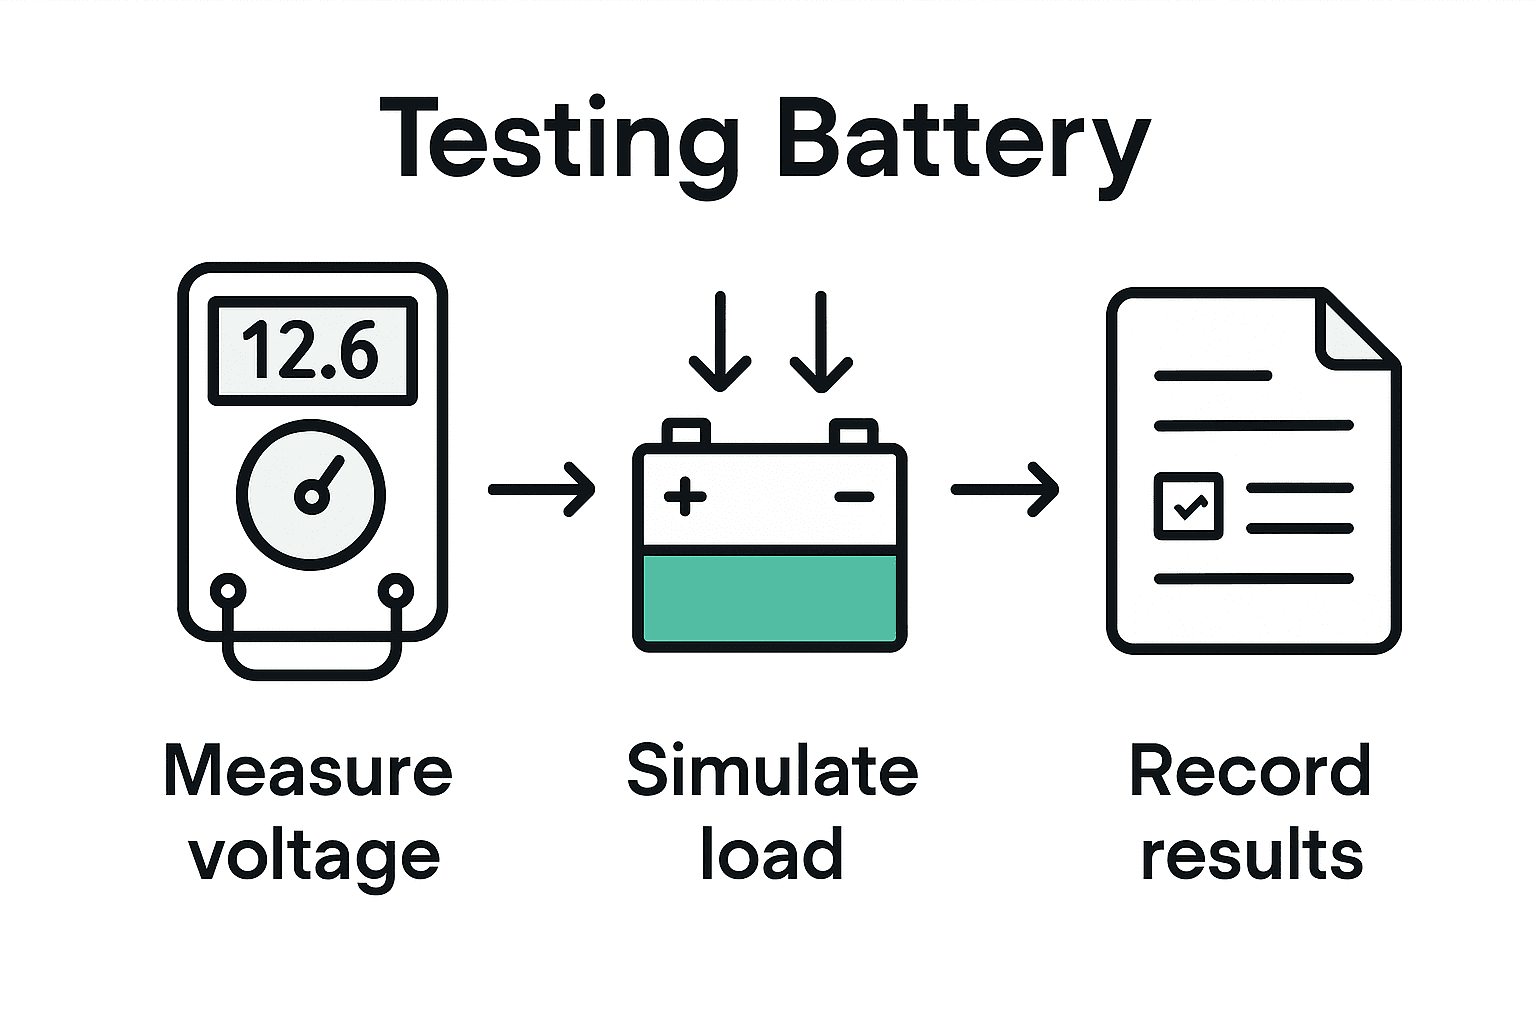
Next, conduct a load test to evaluate the batterys real world performance. Connect a controlled load that mimics your typical energy consumption and measure voltage drop over a specific time period. Healthy batteries should maintain stable voltage under consistent discharge. Record these measurements in your maintenance log to track performance trends over time. Pay close attention to capacity reduction patterns this can help you predict when replacement might become necessary before complete system failure occurs.
Pro Tip: Create a spreadsheet to track voltage readings, load test results, and performance metrics during each maintenance session to build a comprehensive historical record of your solar batterys health.
Step 5: Verify EMS Integration and System Alerts
With the physical maintenance complete, its time to focus on the digital heartbeat of your solar battery system the Energy Management System that monitors and optimizes your energy storage performance. This step is like performing a comprehensive software checkup to ensure everything is communicating smoothly.
Proper integration of system monitoring tools is critical for identifying potential issues, so start by accessing your Energy Management System dashboard. Log into the system and verify that all battery modules are displaying real time data. Check that voltage readings temperature sensors and charge status indicators are functioning correctly. Pay special attention to any error messages or warning indicators that might suggest underlying system complications.
Next, test the alert mechanisms by simulating various scenarios. Temporarily disconnect a power source or introduce a controlled voltage fluctuation to confirm that your EMS generates appropriate notifications. Verify that alert channels email SMS or mobile app notifications are working as expected. This systematic approach helps ensure you will be immediately informed of any potential system anomalies before they escalate into more significant problems. Review the communication protocols and confirm that each alert provides clear actionable information about the specific issue detected.
Pro Tip: Set up a dedicated email folder or notification channel exclusively for your solar battery system alerts to ensure critical system messages never get lost in your regular communication streams.
Step 6: Document Maintenance Actions and Schedule Follow-up
Youve completed a comprehensive solar battery maintenance routine the final step is to preserve your hard work by creating a detailed record and planning for future system health. Think of this as creating a medical history for your energy storage system.
Maintaining comprehensive maintenance records ensures long term system performance and reliability, so start by compiling all your observations and measurements from todays maintenance session. Create a standardized digital template that captures key metrics such as terminal condition voltage readings load test results and any detected anomalies. Include timestamps photographs and specific notes about each inspection point. This documentation becomes your systems health log a critical tool for tracking performance trends and predicting potential future maintenance needs.
Next schedule your next maintenance session based on the manufacturers recommendations and your systems specific performance history. Most solar battery systems require comprehensive checks every six to twelve months but your specific interval might vary depending on usage intensity environmental conditions and battery technology. Set up calendar reminders in your digital system and consider creating automated notifications that will prompt you when its time for the next detailed inspection. By establishing a proactive maintenance rhythm you transform reactive problem solving into strategic system management.
Pro Tip: Use cloud based spreadsheet or maintenance tracking software to create a dynamic living document that allows easy updates and provides historical performance insights at a glance.
The following table summarizes the key maintenance steps and the primary risks they address:
Maintenance Step | Main Risk Addressed | Key Outcome |
System Preparation | Electrical hazards, poor lighting | Safe, organized workspace |
Inspect Connections & Housing | Corrosion, loose terminals | Early detection of problems |
Clean Terminals | Increased resistance, system failure | Stable electrical contact |
Test Charge Levels | Battery degradation | True system health insight |
Verify EMS Alerts | Missed system faults | Real-time issue detection |
Document Actions | Forgotten maintenance history | Reliable performance tracking |
Ensure Reliable Solar Battery Performance with Belinus Energy Solutions
Maintaining your solar battery system demands careful attention to connections, charge levels, and Energy Management System alerts as highlighted in the Solar Battery Maintenance Guide for Reliable Energy Storage. Avoid the costly pitfalls of corrosion, unexpected power drops, and missed system faults by partnering with a solutions provider that integrates cutting-edge battery technologies and smart management tools.

Discover how Belinus�27 innovative residential and commercial battery storage options combined with our powerful centralized Energy Management System deliver not only long-lasting performance but also real-time insights and alert capabilities. With graphene supercapacitors, scalable utility storage, and seamless EMS integration, you can move from reactive maintenance to proactive energy control. Visit Belinus now to explore how you can upgrade your solar energy reliability and get expert support tailored to your needs.
Learn more about our Energy Wall G1 solution and real-time EMS capabilities to protect your investment and maximize energy independence today.
Frequently Asked Questions
How often should I perform maintenance on my solar battery system?
To ensure optimal performance, perform maintenance checks every six to twelve months. Schedule your next session based on your battery’s usage patterns and any specific recommendations provided by the manufacturer.
What tools do I need for solar battery maintenance?
Gather essential tools such as a digital multimeter, insulated gloves, wire strippers, and cleaning supplies. Prepare your toolkit before you start any maintenance tasks to ensure a smooth and safe process.
How can I prevent corrosion on battery terminals?
Prevent corrosion by regularly cleaning the terminals and applying a thin layer of dielectric grease. This protective barrier will help maintain good electrical contact and reduce oxidation, so aim to clean and grease terminals during each maintenance session.
What signs indicate that my solar battery needs replacement?
Signs that your solar battery may need replacement include significant voltage deviations from the manufacturer’s specified range and consistent drop in voltage during load tests. Monitor these metrics regularly to identify potential degradation early and plan for a timely replacement.
How can I document my solar battery maintenance actions effectively?
Create a standardized digital log to record observations, metrics, and any issues encountered during maintenance. Include timestamps and photographs for clarity, and aim to update this log after every maintenance session to maintain a comprehensive health history of your battery system.
What should I check before starting solar battery maintenance?
Before starting maintenance, ensure your solar battery system is completely disconnected from power sources. Shut down inverters, disconnect from the grid, and use a multimeter to verify no electrical activity, fostering a safe environment for maintenance work.
Recommended
Comments